


Neo-Mind
-
Content Count
713 -
Joined
-
Last visited
-
Days Won
37
Reputation Activity
-

 Neo-Mind reacted to vykimo in A rainy day in RO? (finnally)
Hello,
After my Voice Mod and Jumping in RO, here my latest Mod :
Rain Mod By Vykimo
There is looongtime I searched to recreate a rain in RO (I think it is really missing for roleplaying).
After many tests, I found a result rather great, and I think it can be mingled into a kind of rain...
Here a preview (press HD to see the rain) :
Give me some comments!
-
 Neo-Mind got a reaction from dyssense in [Tool] NED - Decryptor for SecureGRF
N.E.D. - Neo Express Decryptor
(suggestions are open for a better name)
What is this?
So you might be wondering if this is really what it says in the title and yes it is. The purpose of this tool is plain and simple.
If you have a GRF encrypted using SecureGRF and you know the password, you can use this tool to decrypt the GRF to get your original back - comes in handy if you forgot to backup the original.
How does it work?
Download it. Open it. Enter the path of your encrypted GRF in the Input Grf field and select the Output Grf filename (by default it suffixes "_decrypted.grf" to the input grf name). Enter the Password and click on Decrypt and your done.
Note: The tool might take a few minutes if your GRF has a large number of files (but I see SecureGRF also taking similar amount of time to encrypt).
Anything else to know?
I made this tool in a day because I was looking for something interesting to do. It has worked so far for all the GRFs I have tried it with.
So just in case keep a backup. Let me know if you find any bugs.
Download Link: NED.rar
EDIT: Added Icon & Progress Bar
-
 Neo-Mind got a reaction from Clare in [Tool] NED - Decryptor for SecureGRF
N.E.D. - Neo Express Decryptor
(suggestions are open for a better name)
What is this?
So you might be wondering if this is really what it says in the title and yes it is. The purpose of this tool is plain and simple.
If you have a GRF encrypted using SecureGRF and you know the password, you can use this tool to decrypt the GRF to get your original back - comes in handy if you forgot to backup the original.
How does it work?
Download it. Open it. Enter the path of your encrypted GRF in the Input Grf field and select the Output Grf filename (by default it suffixes "_decrypted.grf" to the input grf name). Enter the Password and click on Decrypt and your done.
Note: The tool might take a few minutes if your GRF has a large number of files (but I see SecureGRF also taking similar amount of time to encrypt).
Anything else to know?
I made this tool in a day because I was looking for something interesting to do. It has worked so far for all the GRFs I have tried it with.
So just in case keep a backup. Let me know if you find any bugs.
Download Link: NED.rar
EDIT: Added Icon & Progress Bar
-
Neo-Mind reacted to Haziel in [Headgears/Garments] Haziel's Graphics
There's a long time since I don't update this thread, and, in this meantime I've made a lot of work for a lot of customers.
In the next few days, I'll be updating it so, wait for it!
Already added my Custom Garments collection.
I would like to remember you that Custom Garments refers to the visual item for garment slot, they're not headgears.
-
Neo-Mind reacted to Dastgir in [Guide] How to add Custom Jobs
Summoner uses ID 4218
bool pc_db_checkid(unsigned int class_){ return class_ < JOB_MAX_BASIC || (class_ >= JOB_NOVICE_HIGH && class_ <= JOB_DARK_COLLECTOR ) || (class_ >= JOB_RUNE_KNIGHT && class_ <= JOB_MECHANIC_T2 ) || (class_ >= JOB_BABY_RUNE && class_ <= JOB_BABY_MECHANIC2 ) || (class_ >= JOB_SUPER_NOVICE_E && class_ <= JOB_SUPER_BABY_E ) || (class_ >= JOB_KAGEROU && class_ <= JOB_OBORO ) || (class_ >= JOB_REBELLION && class_ < JOB_MAX );}change to
bool pc_db_checkid(unsigned int class_){ return class_ < JOB_MAX_BASIC || (class_ >= JOB_NOVICE_HIGH && class_ <= JOB_DARK_COLLECTOR ) || (class_ >= JOB_RUNE_KNIGHT && class_ <= JOB_MECHANIC_T2 ) || (class_ >= JOB_BABY_RUNE && class_ <= JOB_BABY_MECHANIC2 ) || (class_ >= JOB_SUPER_NOVICE_E && class_ <= JOB_SUPER_BABY_E ) || (class_ >= JOB_KAGEROU && class_ <= JOB_OBORO ) || (class_ == JOB_REBELLION) || (class_ >= JOB_YOURCUSTOMCLASS && class_ < JOB_MAX );}^ on PC.cAssuming that your custom classes are consecutive and JOB_YOURCUSTOMCLASS is job with lowest job ID...
-
Neo-Mind reacted to fxfreitas in [Showcase] FXFreitas Sprites
Next Release
README File:
Not
Released because of 2 bugs, First is Head Bug Some Animations lose the
head and I NEED to fix it before the release. Second is a Pallete Issue
and I'll fix it soon.
And SOON After this Release:
Reshaded, fixing frames in Walk, Battle, Cast Spell and Attack Animations!
-
Neo-Mind reacted to Mystery in Ragnarok Online Mobile Version CN Teaser Trailer at Chinajoy 2015
More information !
http://www.board.midgard-community.com/topic/490-ragnarok-online-guardian-of-eternal-love/#comment-1471
I've also began collecting images from the game!
http://www.board.midgard-community.com/gallery/category/2-ragnarok-mobile/
New trailer if you haven't seen it yet
-

-
 Neo-Mind got a reaction from Helena in Nemo aura over level 99 hex?
did you try using the "Use Custom Aura Limits" patch?
-
 Neo-Mind got a reaction from infitron in [Guide] How to add Custom Jobs
Introduction
For our Example we will create the Custom Class "Shinobi" and its Child version i.e. "Baby Shinobi" along with their Cash Mounts/Halter Mounts. Each Job has 3 ID values :
1) Job ID - we will use 4230 & 4231 respectively for the jobs (4232 & 4233 will be reserved for the mounts client side). 2) Map ID - Also called EA Mask. If we are extending a class we OR the existing class with a modifier. Since Shinobi is going to be a seperate branch, we will use 0x11 for Shinobi and 0x11 | 0x2000 for Baby Shinobi (0x2000 is the JOBL_BABY mask). 3) Msg ID - Defined in messages.conf file. We will use 700 and 701. Before we begin, A few points to note:
1) For the client side i will be using my own patch from NEMO not Xray clients - So dont ask me about Xray.
2) This guide is meant to be an overview towards adding jobs - meaning that your job will be enabled once you have done the changes specified here . You can add further details on your own which depends on your Class.
3) If i am missing out on anything please let me know. Nobody is perfect including me
4) We will use Sprite and some data from Ninja class for the time being but you can add your own entries just as easily.
Server Source 1) src/common/mmo.h: look for JOB_REBELLION assignment and insert our Job IDs after it.
2) src/map/map.h: look for MAPID_BABY_CHASER and insert our Map IDs after it. 3) src/map/pc.c: i) find case JOB_BABY_CHASER: and insert our cases after it ii) find case MAPID_BABY_CHASER: and insert our cases after it iii) find case JOB_REBELLION: followed by return msg_txt(655); and insert our cases after it. (returns the Msg ID) iv) find { "Rebellion", JOB_REBELLION }, and insert our Job Names after it 4) src/map/itemdb.c: Here we check the job masks that is specified in item_db.conf. There is one limitation, however. Currently there is only 1 more slot left in the job mask since it is 32 bit. In case you need to add more you will need to change the variable to 64 bit. Find jobmask & 1<<30 and insert our class check after it. 5) src/char/inter.c: Find case JOB_REBELLION: and insert our case after it.(returns the Msg ID) Server Config 1) db/const.txt: i) Find Job_Rebellion and insert our Job IDs after it ii) Find EAJ_BABY_CHASER and insert our Map IDs after it 2) db/<pre-re|re>/exp.txt: Insert your IDs in one of the entries (or if you want to specify your own exp per level you can add that). Since our jobs are meant to be amongst First Class, we will simply add it into existing ones. i) Base: ii) Job: 3) db/<pre-re|re>/job_db.conf: Add entry for your Job. We will copy the entry from Ninja with slight changes for now. 4) db/job_db2.txt: Add entry for your Job. Again we will reuse the data from Ninja. 5) conf/help.txt: Insert your class entries to the @go message 6) conf/messages.conf: Add the Msg IDs after Shadow Chaser T 7) db/<pre-re|re>/skill_tree.conf: Add entry for your Job similar to the others. -pic to be added- Client Lua Files Now to make the client support Custom Jobs it should be patched with "Enable Custom Jobs" patch in NEMO. Also you should copy the lua files inside Support folder to different area so we can Add entries of our jobs. (LuaFiles514/Lua Files/Admin folder inside is what we need essentially) 1) PCIDs.lub : i) First we add all our Job IDs (look for JT_2004_JOB_LAST entry). ii) Next we connect the Cash Mount Job IDs to Main Job IDs (Look for JT_REBELLION mapping). iii) Lastly we need to add our Baby Class & its mount to the Baby_List (Look for JT_LION_CRUSADER_B). 2) PCNames.lub: To illustrate that different names can be assigned based on gender, I am calling them as Shinobi M & Shinobi F for Male & Female respectively. i) First we add the Job Name for Male Characters (Look for Rebellion) ii) Next we make the Cash Mounts inherit Names from their respective Main Jobs - since Mounting don't change the name (Look for JT_PECO_REBELLION). iii) Last but not least we add the Job Name for Female characters - Only necessary if it differs from Male name (Look for JT_SORCERER_B). 3) PCPaths.lub: Here we specify the job specific prefix used by the client to get the job sprite. i) First we add the Path prefix for Jobs that is not shared with any existing ones. ii) Next we make the Jobs that has shared path inherit from existing (for e.g. Baby Jobs inherit from Adult versions). 4)PCHands.lub: Here we specify the job specific prefix used by the client to get the weapon and shield sprite locations i) Like before, First we add the Hand prefix for Jobs that is not shared with any existing ones. ii) Next we make the Jobs with shared prefix inherit from existing (e.g. Baby Jobs, Mounts, Baby Mounts etc. all can inherit from Adult versions). 5)PCPals.lub: Here we specify the job specific prefix used by the client to get the Palette file location. i) Like before, First we add the Pal prefix for Jobs that is not shared with any existing ones. ii) Next we make the Jobs with shared prefix inherit from existing (e.g. Baby Jobs, Mounts, Baby Mounts etc. all can inherit from Adult versions). Note: You can also optionally add entries in PCImfs.lub file in case you have an Imf file, but I haven't seen any issues even without it. Hence I am not pursuing it. Once the edits are done pack it into your grf or put it in your data folder and use it. With this much your job will be visible and able to do everything provided you have the sprite files in the right location. spriteÀΰ£Á·¸öÅë³²<pathprefix>_³².spr and act for Male Job spriteÀΰ£Á·¸öÅë¿©<pathprefix>_¿©.spr and act for Female Job Snapshot: (to be added) -
 Neo-Mind got a reaction from Lavenblade in Font color change on GUI
Other than chat color (since there is @fontcolor to modify that) almost all of the Texts are drawn using colors already set inside the exe.
So yeah I would say it would be a good idea to go with what @@Mysterious suggested. I am assuming you are using NEMO for patching -
Change the "Message" in TranslateClient.txt to "" and use a MsgBox pic with the word Message already added
-
 Neo-Mind got a reaction from Nebraskka in Oldest client
Hi,
Well I was planning to post this in Client support section first but its not exactly a support question. Just wanted to know what is the oldest client date people use now? and which type (RagexeRE, Ragexe or Sakexe)?
The reason I ask is because i plan to extend support of my patcher to old clients along with my current bug fixes.
-
 Neo-Mind got a reaction from Obitto in [Guide] How to add Custom Jobs
Introduction
For our Example we will create the Custom Class "Shinobi" and its Child version i.e. "Baby Shinobi" along with their Cash Mounts/Halter Mounts. Each Job has 3 ID values :
1) Job ID - we will use 4230 & 4231 respectively for the jobs (4232 & 4233 will be reserved for the mounts client side). 2) Map ID - Also called EA Mask. If we are extending a class we OR the existing class with a modifier. Since Shinobi is going to be a seperate branch, we will use 0x11 for Shinobi and 0x11 | 0x2000 for Baby Shinobi (0x2000 is the JOBL_BABY mask). 3) Msg ID - Defined in messages.conf file. We will use 700 and 701. Before we begin, A few points to note:
1) For the client side i will be using my own patch from NEMO not Xray clients - So dont ask me about Xray.
2) This guide is meant to be an overview towards adding jobs - meaning that your job will be enabled once you have done the changes specified here . You can add further details on your own which depends on your Class.
3) If i am missing out on anything please let me know. Nobody is perfect including me
4) We will use Sprite and some data from Ninja class for the time being but you can add your own entries just as easily.
Server Source 1) src/common/mmo.h: look for JOB_REBELLION assignment and insert our Job IDs after it.
2) src/map/map.h: look for MAPID_BABY_CHASER and insert our Map IDs after it. 3) src/map/pc.c: i) find case JOB_BABY_CHASER: and insert our cases after it ii) find case MAPID_BABY_CHASER: and insert our cases after it iii) find case JOB_REBELLION: followed by return msg_txt(655); and insert our cases after it. (returns the Msg ID) iv) find { "Rebellion", JOB_REBELLION }, and insert our Job Names after it 4) src/map/itemdb.c: Here we check the job masks that is specified in item_db.conf. There is one limitation, however. Currently there is only 1 more slot left in the job mask since it is 32 bit. In case you need to add more you will need to change the variable to 64 bit. Find jobmask & 1<<30 and insert our class check after it. 5) src/char/inter.c: Find case JOB_REBELLION: and insert our case after it.(returns the Msg ID) Server Config 1) db/const.txt: i) Find Job_Rebellion and insert our Job IDs after it ii) Find EAJ_BABY_CHASER and insert our Map IDs after it 2) db/<pre-re|re>/exp.txt: Insert your IDs in one of the entries (or if you want to specify your own exp per level you can add that). Since our jobs are meant to be amongst First Class, we will simply add it into existing ones. i) Base: ii) Job: 3) db/<pre-re|re>/job_db.conf: Add entry for your Job. We will copy the entry from Ninja with slight changes for now. 4) db/job_db2.txt: Add entry for your Job. Again we will reuse the data from Ninja. 5) conf/help.txt: Insert your class entries to the @go message 6) conf/messages.conf: Add the Msg IDs after Shadow Chaser T 7) db/<pre-re|re>/skill_tree.conf: Add entry for your Job similar to the others. -pic to be added- Client Lua Files Now to make the client support Custom Jobs it should be patched with "Enable Custom Jobs" patch in NEMO. Also you should copy the lua files inside Support folder to different area so we can Add entries of our jobs. (LuaFiles514/Lua Files/Admin folder inside is what we need essentially) 1) PCIDs.lub : i) First we add all our Job IDs (look for JT_2004_JOB_LAST entry). ii) Next we connect the Cash Mount Job IDs to Main Job IDs (Look for JT_REBELLION mapping). iii) Lastly we need to add our Baby Class & its mount to the Baby_List (Look for JT_LION_CRUSADER_B). 2) PCNames.lub: To illustrate that different names can be assigned based on gender, I am calling them as Shinobi M & Shinobi F for Male & Female respectively. i) First we add the Job Name for Male Characters (Look for Rebellion) ii) Next we make the Cash Mounts inherit Names from their respective Main Jobs - since Mounting don't change the name (Look for JT_PECO_REBELLION). iii) Last but not least we add the Job Name for Female characters - Only necessary if it differs from Male name (Look for JT_SORCERER_B). 3) PCPaths.lub: Here we specify the job specific prefix used by the client to get the job sprite. i) First we add the Path prefix for Jobs that is not shared with any existing ones. ii) Next we make the Jobs that has shared path inherit from existing (for e.g. Baby Jobs inherit from Adult versions). 4)PCHands.lub: Here we specify the job specific prefix used by the client to get the weapon and shield sprite locations i) Like before, First we add the Hand prefix for Jobs that is not shared with any existing ones. ii) Next we make the Jobs with shared prefix inherit from existing (e.g. Baby Jobs, Mounts, Baby Mounts etc. all can inherit from Adult versions). 5)PCPals.lub: Here we specify the job specific prefix used by the client to get the Palette file location. i) Like before, First we add the Pal prefix for Jobs that is not shared with any existing ones. ii) Next we make the Jobs with shared prefix inherit from existing (e.g. Baby Jobs, Mounts, Baby Mounts etc. all can inherit from Adult versions). Note: You can also optionally add entries in PCImfs.lub file in case you have an Imf file, but I haven't seen any issues even without it. Hence I am not pursuing it. Once the edits are done pack it into your grf or put it in your data folder and use it. With this much your job will be visible and able to do everything provided you have the sprite files in the right location. spriteÀΰ£Á·¸öÅë³²<pathprefix>_³².spr and act for Male Job spriteÀΰ£Á·¸öÅë¿©<pathprefix>_¿©.spr and act for Female Job Snapshot: (to be added) -

 Neo-Mind got a reaction from Kyoya G in NEMO - Client Patcher
N.E.M.O. - Neo Exe Modification Organizer
Why another client patcher? well
1) WeeDiffGen - isn't working for 2013 clients + it depends on dlls (not that its a bad thing but i like scripting )
2) xDiffGen - yes its scripted but we need to depend on xdiff files.
so i made a new one based on xDiffGen and here it is. The patches are written in QtScript format.
Details of making a patch have already been written in a seperate topic - although now it needs to be updated with more details.
I have already converted most of the patches from xDiffGen.
Why this name? - well I didn't want it to be called * Gen No offense
plus someone keeps calling me Nemo in IRC which gave me the idea
Snapshot
-----------------
How to use?
---------------------
1) First you need to specify your client file in Input Exe file box. If you browse to select the file name, Output Patched box gets updated with a _patched suffix filename automatically. Ofcourse you can select your own name for the output.
2) Next we need to load both the client and the scripts (patches & addons). so click Load Client button.
3) Select the patches you want . In case you patched once before (for whatever date) they will be saved in your local and you can use the Select Previous button to select them again. Also you can try using the Select Rcomnded button to select all the Recommended patches.
4) So your patches are selected and client is loaded what next but to Apply Patches which will generate the output file. In 2.0 version , NEMO also generates a .secure.txt file containing the MD5, SHA1 and CRC32 values of the output exe file which you can use in various tools.
5) You can use the Save Profile and Load Profile buttons for saving/reloading a set of patches & input values, that you have selected (even if they are not applied) for future use.
6) Whenever you apply patches to a client, NEMO updates the patchlist.log file (along with Inputlist.db) in the folder where NEMO.exe is. This file will contain the list of patches you have applied along with their IDs (do not tamper with either of them).
Changes in 2.0:
----------------------
1) I have made some obvious modifications to the interface (you can definitely see the change in case you have seen v1.0).
i) Buttons have come downwards and is no longer strippable (toolbar has been fixed in position)
ii) New status Label has been added which shows your currently loaded client date and how many patches are selected.
iii) NEMO now has support for Addons - scripts that are meant to retrieve data from the client and do its own thing (not patch the client).
All the Extract xDiff patches has been added here already. 1 extra addon will be coming soon once i can fix it.
iv) New Filter box has been added which does live search (i.e. filter as you type) for filtering out only the patches u want to see.
For e.g. if you type color, it will only show patches that have the string color in either it's name or the description.
You can also use regular expression . Also you can sort the columns now
v) An upcoming feature - Test Patches. this one you can use for testing a newly added patch for a variety of clients that you select.
2) NEMO is no longer there in SVN. I have shifted it to GitHub . The rar file uploaded has the .git file so you should be able to directly pull to get updates. But just in case I have also provided the repository link below.
Remember to pull for updates before using NEMO and let me know if you are facing any bugs or issues or if i have missed out on anything. Enjoy .
Repository: https://github.com/MStr3am/NEMO.git
Download Link: NEMO zip file
-
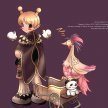
Neo-Mind reacted to Rytech in Dress Pack
View File Dress Pack
What Is It?:
The dress pack is a content pack that enables full
use of the dressing room feature and also adds
official alternate styles for 3rd jobs from jRO.
How To Install:
To use, simply have your DATA.INI file set to
read the dressroom.grf before the data.grf/rdata.grf
files. You can also use the tool GRF Editor to merge
into your custom grf if desired.
A 2015-10-29aRagexe or newer client is required for
this to work properly. This file only adds support for
the client side and will only let you view things in
the dress room window. The server must fully support
the system as well along with the "body" value in the
character data.
You will need to enable the "save_body_style" config
in the conf/battle/client.conf to allow your server
to save selected body styles.
More info can be found in the read me file.
Submitter Rytech Submitted 12/20/15 Category Client Resources
-
 Neo-Mind got a reaction from evilpuncker in [2015-12-31] FAKE_NPC and the NPC View ID -1
Oh good. Human Readability FTW.
-

-
 Neo-Mind got a reaction from jTynne in Is it possible to display monsters w/IDs above, say, 10,000?
Its a limitation of client. I did some checks about this some time ago. But i lost all the data now. Anyways there is a hardcoded mob id check inside the client.
-
Neo-Mind got a reaction from evilpuncker in Changing Matk "+" to "~"
EDIT: Yes this is possible via hexing
-
 Neo-Mind got a reaction from kyeme in Changing Matk "+" to "~"
EDIT: Yes this is possible via hexing
-
Neo-Mind reacted to Haziel in [Headgears/Garments] Haziel's Graphics
@Banana:
Thank you for your feedback!
Megaman X and Zero Helmets added.
-
Neo-Mind reacted to vykimo in Jump in RO -something fresh and new
Wanna see something new into Ragnarok?
Let's check my latest creation : Little Jump in Ragnarok !
Check it now :
In this version you only can jump with Inser on the keyboard (usually used for sitting), that's why I don't release this now. I dream that one day I can put it on space or another one keyboard button.
Can I get some review?
-
Neo-Mind reacted to vykimo in Characters' voices in Ragnarok
Another feature to bring to RO some fresh air (and to looks like more like an actual mmorpg).
We are all accustomed to play some characters with no voices but what if they can now shouting when dying, attacking, receiving damage and even shouting some skill's names?
I called it "Voices Mod by Vykimo", take a look at this video demo :
Feel free to express your feeling about this very very unusual thing in Ragnarok.
-
 Neo-Mind got a reaction from relith82 in [Guide] How to use a secondary ItemInfo file
Introduction
Well this idea came up when evilpunker asked about the possibility of having a patch which loads a second file which overrides the iteminfo file. But there is a better way to do that with lua itself.
How to do it?
The key idea is that the item information is added using the main function by the client. so in your custom file you just need to modify the main function to accept your items. Here is how it can be done.
-- Load the original file. As you might have guessed you can also load your translated file here instead -- (just make sure the "tbl" array contains your item info) dofile("System/iteminfo.lub") -- Now as a simple example . I am simply going to change name of Red Potion to Crimson Potion. -- But you can add anything in the same way. Format is same as the original one, just -- the table name is different tbl_custom = { [501] = { unidentifiedDisplayName = "Crimson Potion", unidentifiedResourceName = "»¡°£Æ÷¼Ç", unidentifiedDescriptionName = { "A potion made from", "grinded Red Herbs that", "restores ^000088about 45 HP^000000.", "^ffffff_^000000", "Weight: ^7777777^000000" }, identifiedDisplayName = "Crimson Potion", identifiedResourceName = "»¡°£Æ÷¼Ç", identifiedDescriptionName = { "^000088HP Recovery Item^000000", "A potion made from", "grinded Red Herbs that", "restores ^000088about 45 HP^000000.", "^ffffff_^000000", "Weight: ^7777777^000000" }, slotCount = 0, ClassNum = 0 }, } -- Now for a helper function because i hate repetitions -- It adds items from curTable if it is not present in refTable function itemAdder(curTable, refTable) for ItemID,DESC in pairs(curTable) do if refTable == nil or refTable[ItemID] == nil then result, msg = AddItem(ItemID, DESC.unidentifiedDisplayName, DESC.unidentifiedResourceName, DESC.identifiedDisplayName, DESC.identifiedResourceName, DESC.slotCount, DESC.ClassNum) if not result then return false, msg end for k,v in pairs(DESC.unidentifiedDescriptionName) do result, msg = AddItemUnidentifiedDesc(ItemID, v) if not result then return false, msg end end for k,v in pairs(DESC.identifiedDescriptionName) do result, msg = AddItemIdentifiedDesc(ItemID, v) if not result then return false, msg end end end end return true, "good" end -- And the newly designed main function function main() result, msg = itemAdder(tbl_custom, nil) -- add custom items (including official overrides) if result then result, msg = itemAdder(tbl, tbl_custom) -- add non-overridden official items end return result, msg end
How is it useful?
Think how item_db2.txt is useful for adding custom items in a server. Its the same strategy here.
You can keep your official items in a base file (or you can just use the official iteminfo.lub file if you want the korean names)
and keep your custom items in a different file (make sure the first dofile function calls the base file).
The above code is error free, so feel free to copy and add your items . Hope the topic was not too confusing
The lua code can be further expanded for overriding only parts of an official item. But i will leave that update for the future
P.S. The client should be patched to accept your custom file not the base file.
Screenshot
-
Neo-Mind reacted to fxfreitas in [Showcase] FXFreitas Sprites
Finished Dark Knight Sprites:
(No SPR if you want a spr file, made it or wait the completed shaman sprites)
Next, Shaman.


